Not updated for a fair bit... Lots of pictures commence.
I'm still not in the position to continue onwards inside since the old electricty is still live, but the guy should have come today, so hopefully tomorrow he will be there.
So, two-three weeks work in a few pictures.
So, before shot looking one way..
And back the other..
All the crap on the ground, next door neighbours garden is a jungle with lots of debris in it..
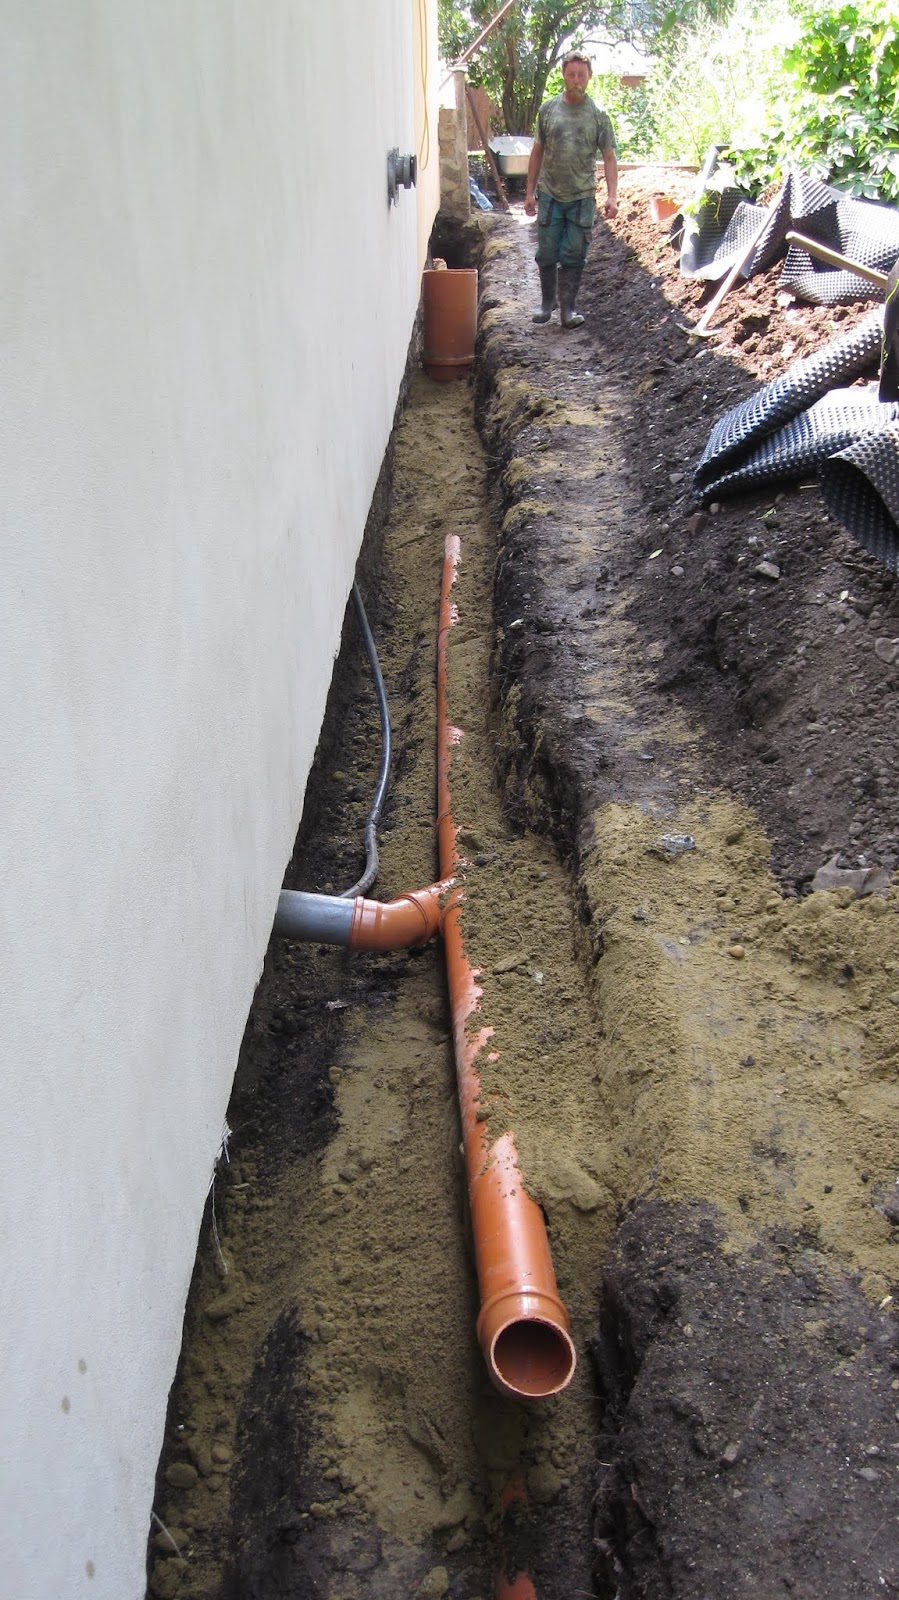
Found existing sewer pipe from grannies side, 40cm in soil, 110mm into 160mm then 90 deg turn.. all the joints resting in concrete for some reason..
And off we go... spade and shovel galore.
First pass at trenching one spade depth down.
And a few passes with steps down...
And off towards the wall at the front garden under its massive foundation (All of 2cm deep)
At about 1.2M depth here.
And looking from grannies bathroom towards front garden wall.
Front garden wall looking back to trench, you can see a gas pipe that I stumbled across, 20cm in the ground, tar wrapped steel pipe, no sand/peagravel or marker tape.. created a series of steps here to get into the hole.
And another pass down levelling out..
And off towards the front fence for inspection chamber, and there's the gas pipe feeding the property.. (And next doors property..) Nice bedding for it, and marker tape..
Some shots of the "pea gravel" holding it up. (2 or 3 pieces of 30x30cm concrete blobs..)
The spoil heap..
And the hole excavated under gas pipe... to an end of 1.5M
Looking back under the wall on my steps.
And the end where the inspection chamber will be at edge of property.
A ladder for scale :)
And the hole for the inspection chamber.. with electric cable we put in back in september last year.
Dug out next to the gas regulator for the new electrical box and to see which way the gas went off towards the gas main outside the property.
It was decided that hydro-insulation would be put against the foundation whilst we were at it anyway.
So, excavated onwards to edge of polystyrene insulation.
Took me about 3 hours to do a 2M stretch, horrible horrible ground and the polystyrene insulation makes it impossible to get a pick axe or spade in there to make a hole, as the insulation against damp is 1M tall so needs to go 80CM into the ground, the trench is only 40cm.
All cleared up.
And another recess cut into the soil for a second inspection chamber with Y entry for new part of the house, its below the level of the foundations so I'll dig down on the other side and tie into it by going under the foundation.
All cleared up.
Arrived one morning to find a new nice shiney fuse box on the electricity pole across the road :)
And the contracters finally arrived.
They dug down 4M to the main sewer, and tied into it, the steel box is to stop the trench collapsing on the workers as its clay/loam soil and they are below the water table.
And continuing towards the property.
Bedding sand on main junction tying into the main sewer, 2 properties are served by one junction.
A rather stupid way of tying into the mains water if you ask me, with valves and rods directly above the main sewer... but hey-ho who am I. So water pipe is on right, sewer pipe in middle and electrical conduit on left. (160mm sewer!!)
New inspection chamber in and pipe bedded in.
15 degree angle before going under wall and next to property. (125mm pipe)
Aron cooling down.. little mut keeps on trying to collapse my beautifull spoil heaps!
2nd inspection chamber and 110mm pipe going up to grannies side.
2nd inspection chamber and 125mm going towards main inspection chamber under wall.
The inspection chamber for tying into at a later point in time.
Aron trying to make a hole in the spoil heap for some reason...
Sand bedding in..
Grannies side and a DIY approach rodding access (As they dont do it in this country..)
Hydro-insulation in place and the water pipe is on the left there also at 80cm in the ground.
More bedding, and a little box which will be concreted in place for rodding access once the ground settles.
A 1.3 x 1.3 square dug out and sand bedding put in place for the water meter inspection chamber... utterly Over the top in my opinion, but it has to be 1.2M down minimum according to regulations to stop it freezing in winter, and because its so deep it requires full access for a person, result is a 1.5M tall plastic tank with 600mm enterance and 1.1M round diameter.
Here it is in place.
Trench part one filled in..
Water pipes connected, they buried the pipe before I had the chance to route it to where I wanted, so its all a bit backwards but it will work, the incomer is at the "back" of the chamber facing the house.. and the outgoing towards the property wrapped around the front.
Aron trying to commit suicide, sliding off a 60 degree spoil heap into the 1.5M deep hole... he did actually fall in but I didn't have enough time to take a picture of it!
Sand bedding in place protecting water pipe etc.
All covered up and levelled out.
Same again... need to leave it to settle for now.
And next to the house all levelled out..
The branch inspection chamber.
The end with rodding access, which also needs to settle before the concrete comes out.
And showing the hydro insulation and the soil level.
Still a few things to do, like add valves for water at a later date, and install the lids on the chambers, they were supposed to be here on monday but havent' turned up yet..