Looking around I started to wonder about cracks in walls and what state they were in, I knew that the middle wall had shifted a long time ago but since its being removed completely there's no issue with that. However in the top picture you can see a crack leading diagonally.. which will require further investigation at some point.
There are three cracks in this picture which worried me a bit since its the front corner of the house.
Another large crack between the middle wall and the outside wall, no problem as its going to be removed... however the diagonal crack is a bit odd.
So I went off and started to investigate knocking the render away.. No issues to be found as the rocks in the wall are still in one piece, so its surface cracks only here.
Knocked off some more render on the front side of the house near the cracks and the top patch in this picture is fine, no issues there, but the lower crack is split right along the joints of rocks in the wall, and will probably require pointing up again properly as at the moment its held together with very weak mortar and Loam/Clay.
Anyhow, knocked the ceiling out in the right room and cleared it all up, 3 afternoons work after school.
And this is yesterdays work, cut free the ceiling all the way round with the SDS hammer drill and chisel bit.
All the way round so it can come down properly.
Removed the boards from the top side in the loft, I think this was the first side they did as every single board on every single beam had at least 4 nails in it!
1-2 hours later with a large lump hammer... everything knocked down.
Wood/Straw/Wire/Mortar-render.
And the heap outside just seems to be growing and growing, must be a good 8-10M long by 4 meters wide by now and 1 - 1.5M tall. I made a special ramp with an old ladder and some planks to get up on top!
And the planks.. which granny is painstakingly removing nails, wire and pegs from... so we can burn it.. If it was up to me it would be burnt right now or given to gypsies to burn, its simply not worth all the work of removing nails etc for firewood... besides we have plenty of firewood already!
Oh well, what can one do ?
Pageviews last month
Sunday, 11 March 2012
Clearing out and investigation part 2
Moved onto the other room and did the same, locating old electrics and stripping them out completely as they were cut off months ago during the removal of the connecting wall.
I simply grab the hand held metal detector and start searching for the strongest signal, and mark it out.
Round circles are connection boxes 9 out of 10 times, but this time it was wrong!
All uncovered
2 boxes found in this state, I can't believe this is still "safe".
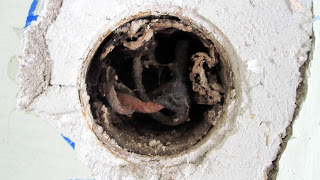
And what in earth is this, a 1cm thick metal peg in the wall... bit of overkill if you ask me to hold a conduit in the wall!
Then moving onto the light for removal.. I undo the screw and I'm completely shocked..
Lots of mouse droppings..
And this.. a mouse nest.. talk about fire hazard!!
Nest removed and wires bent down.. simply twisted together aluminium with some sticky tape over the ends..
Health and safety clearly didn't exist in the 50's!
Clearing out and investigation.
Finally managed to clear out the remainder of stuff in the two front rooms. The bed was dismantled and placed in the loft along with paintings and some other smaller furniture. The big cupboard has been relocated to the garage, another big cupboard to the workshop/storage area.
The garage underwent a large clean up in order for the new cupboard to fit in.
Another old bed and wonky table is destined for garbage.
And we uncovered another pile of old carpets under the bed, I think granny has enough carpets to re carpet her whole house about 3 times over.. naturally all these carpets had to be stored in the garage..
Anyhow, uncovered all the electrical spaghetti in the front left room to make sure I wouldn't electrocute myself by mistake in future.
Water pump supply
As some as you might remember, A plan was made to rewire the existing water pump and also run water from the basement to the new boiler platform above the new bathroom. This ran underneath granny's room floor underneath the insulation and concrete slab to the basement.
So, here's the new electrical box (IP44) on the wall mounted in the basement, with its cable feeding through underneath granny's room floor. The big grey pipe will be cut to size and house a water pipe leading to the boiler platform.
Here you can see the existing pump wiring "hanging" or doing whatever it does... its shocking really, I think its 0.75mm wire as well.(and its un-earthed)
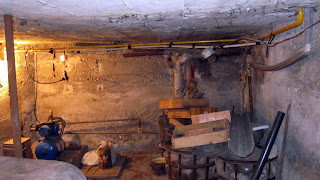
A view of the basement... full of rubbish, lots of bodge jobs such as using a gas valve on speedfit for water (Yellow handle) and extension cables on extension cables, electrical tape etc.. And the remains of the old boiler set-up.
And here the pipe appears underneath the wall outside grannies room, I cut a new groove in the wall for ducting and now the cable goes straight up to the loft so it can be connected into the new fusebox at some point.
Hallway update.
Maria's father helped to smooth out the walls some more as it became awfully patchy with various depths of render on the wall.
Impatient Granny decided to "help".
She went crazy and started painting everything such as light switches and the brand new light holder (Inclusive of its bulb).
She also decided to "help" remove some of the spillage of render off the new door frame with what I can only presume was a cheese grate of some sorts and scratched all the paint off it so it requires repainted (again)
Anyhow, the floor is going to have to wait till the other rooms are done as the floor heating requires continuous pipework and I don't want it dangling in the way for the next 3-4 months.
Anyhow, it now looks like this. I need to finish the electrics off at some point but I'm still waiting on components to arrive, as well as sussing out what still needs to be re-connected in granny's side (Which is proving a pain as its going to involve a lot of extra work I hadn't counted on!)
Subscribe to:
Comments (Atom)


